A
Re-Useable
Spiderweb Coil
Form
by
Mike
Tuggle's
A lot of recent discussion has centered about using
those
useless AOL
Free Offer CDs as spiderweb coil forms. The suggested ways to do
this all seem to involve a lot of power equipment, including table saws
and milling machinery -- nice, if you have it. Also involved is a
lot of sanding to remove the metal foil which otherwise would ruin the
disk as a coil form. I figured there's got to be a simpler
way.
Here's one that's a little simpler, and it doesn't involve powered
equipment
or extensive sanding.
I'm not sure how the old wives' tale about 'brittle
CD
disks' came
about -- or why it continues to be perpetuated. In fact CDs,
being
acrylic plastic-metal foil laminate, are tough as nails. Try to
snap
one in half -- sure, you can get it into two pieces after repeatedly
bending
it until it fails. Point is, they are sturdy.
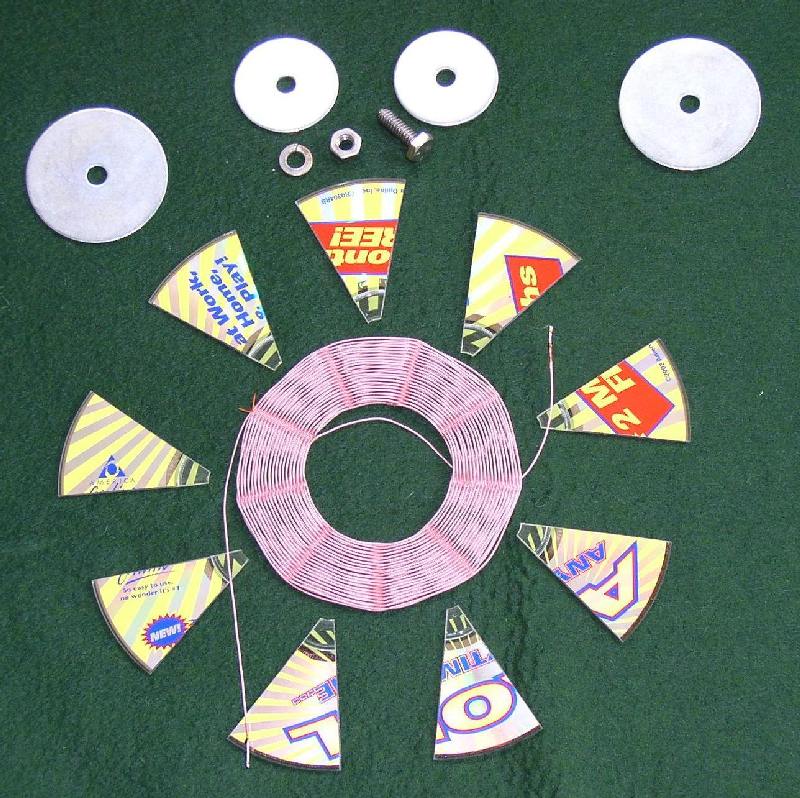
For a nine-section form draw a 40-degree angle on
some
paper.
Center the CD on the apex (shiny side up works best) and trace the
cut-lines
with a sharp scribing tool or knife blade. Continue to mark off
40-degree
lines, first to one side, then to the other, working your way around
the
disk. How close that last pie section is to 40 degrees depends on
how carefully you marked off the other cut lines. If it's off a
little
bit, no big deal -- this won't show in the final coil.
Now, hacksaw the CD into nine 40-degree pie
sections.
Some
points: Use a fine '24 tooth' or finer blade. Hold the disk
so the cut line rests at the edge of a block of scrap wood -- this
makes
a useful guide for a straight cut. Patience is the keyword here
--
the plastic heats up at the cut point and will tend to 'grab' the blade
-- back off for a few seconds, then continue cutting. The last
cut
is toughest -- very little disk left to hold onto.
Sand all the cut edges to remove plastic and foil
burrs.
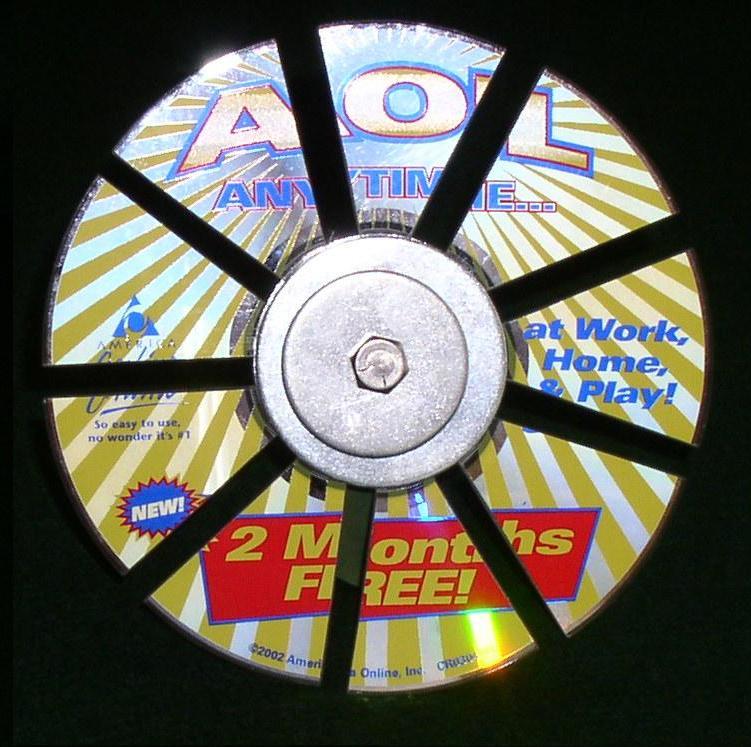
The hub that holds these pie sections (vanes) is a
sandwich
of two
2-in. dia. fender washers and a 1/4-in. bolt. As you can
see,
I've also stacked 1-1/2-in. washers on either side to 'even out' the
bolt's
pressure. I guess this works.
The tips of the pie sections are inserted into the
sandwich, up to
the raised CD hub ring. Because the hub ring, originally
11/16-in.
radius, is now spaced out to a 1-in. radius, wider (approx. 1/4-in.)
gaps
fall between the pie sections, making for easy winding.
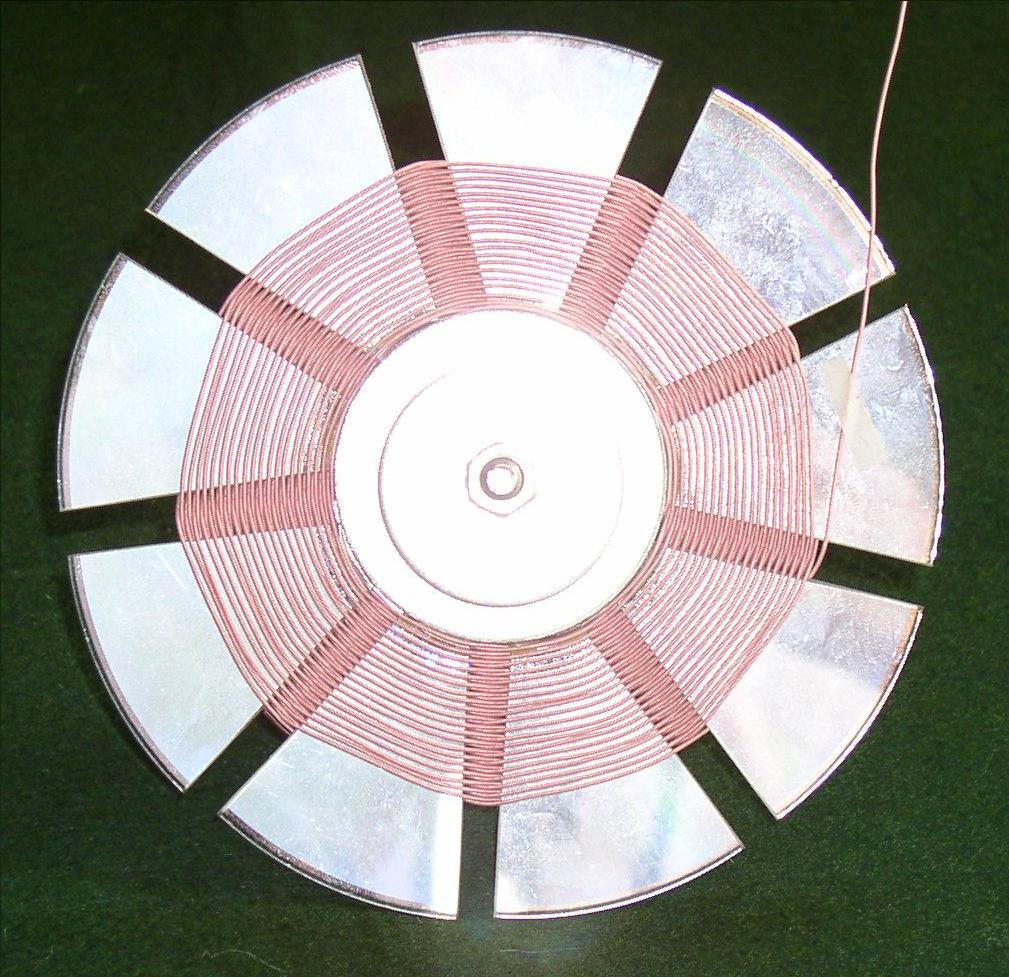
Using
the logo side as a guide, I assemble the pie sections in their original
order in case there were irregularities in my saw cuts. This
assembly
is the trickiest part -- get all the pie sections inserted without
worrying
about their spacing around the hub. Then tighten the bolt so that
all pie sections are held in but can be wiggled about. If one pie
section still wants to fall out, place a single layer of tape (masking,
cello-) on the inside faces of the big washers.
Once all pie sections are more-or-less equally spaced
about
the hub,
give the bolt a final tightening. There's your form. Happy
winding !
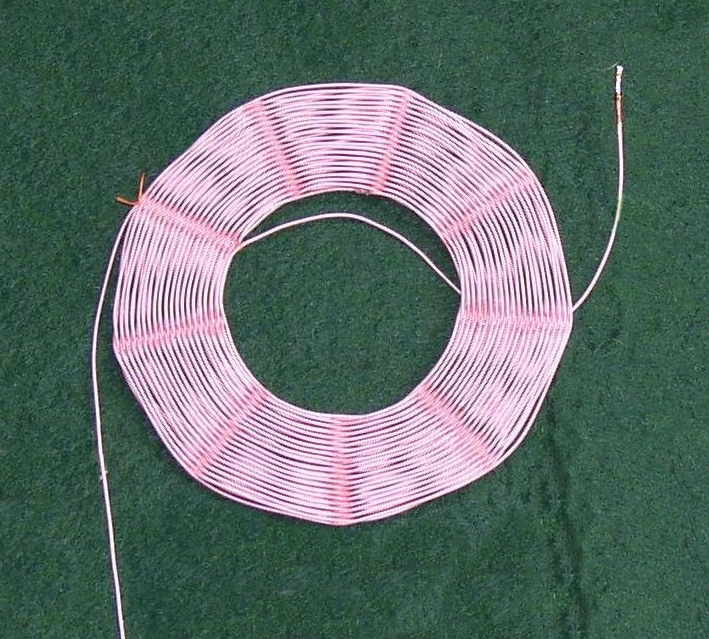
Once your coil is wound ...
apply, sparingly, a bead of glue along the wire
crossover
lines in
the slots. Flip the coil over, and do the same for that
side.
I say sparingly, because the idea is to not glue the wire to a pie
section.
If you don't believe enough glue has been applied to hold the coil
together,
let it dry and repeat gluing.
Styrene-based 'coil dope' is a good glue for this --
it's
supposedly
low loss. You can make your own by dissloving styrofoam into
lacquer
thinner (not acetone). A milliliter or two of lacquer thinner
will
be more than ample for several coils -- and you will be truly amazed at
how much styrofoam must be dissolved in this to give even a thin
glue-like
consistency. In standard units, two milliliters will dissolve at
least 20 styrofoam peanuts. I see some peanuts are foamed
polyethylene
-- I got my doubts whether they will dissolve. If you're not sure
test them out with a drop of lacquer thinner.
After all is glued and dried, the hub is unbolted and
pie
sections
removed. Formless and self-supporting -- works like a
charm.
I used a loop of thread to further secure the very start and end of the
winding.
Mike Tuggle

Finished Coil With Form Removed!!
|